Maple Harvest Time... Almost

The wife and I went to visit our daughter at college last weekend (shhhh the campus is on lockdown and visitors are not allowed). Anyhoo… in years past, when we’ve made trips along a similar route during mid to late February, the hills and hollers were full of campfires choking the interstate with smoke as the maple sap was cooked down into syrup. During this most recent trip though, there wasn’t a smoke signal to be found.

The reason the cookers aren’t running is entirely due to the conditions here on the ground. Frankly speaking, the weather sucks and it’s not conducive to making maple syrup. There’s a foot of snow still on the ground and the daytime highs (20’s maybe 30’s on occasion) and nighttime lows (teens most nights recently) are still too cold for the sap to run freely. Now we have a ton of ice and additional snow on top of what we already had. Good times.

If this is something that interests you, here are the conditions needed for maple syrup production:

  • Daytime highs of 40-degrees or better

  • Nighttime lows can be in the 20-degree range

  • 10-gallons of sap is ~ 1 quart of syrup once it is cooked down

I’ve been itching to make my own maple syrup since 2019 when I first kinda sorta tried my hand at it. Long story short, I didn’t make it past the collection step. Here’s why: Maple Sap Went Bad.

Now that all of my books are published and I’m taking a much needed break from writing, I’m going to be doing some of the things I’ve wanted to try (Dandelion Wine among other things) or fun projects and skills tests that I previously succeeded at and/or tried and failed.

New Interview Available

Well folks… I’m back on the airwaves with a new interview!

On Saturday (02/13/2021), I was interviewed by John Jeffers over on the Contra Radio Network. This is my second interview with John and, to be honest, he was my first call when I decided to do podcasts interviews again.

In a nutshell, we talk about a lot of stuff and, after having listened to the production just this morning, I think you’ll laugh, chuckle, cringe, and nod your head to a great many things we had to say. We talk about my books, obviously, but we also delve into some detail regarding the genesis for my books and preparedness in general. There’s a fair amount of time spent on politics, the election, the woke mob, current events, and more.

I’ve posted links to the interview from a number of podcasts sites where the Contra Radio Network is available on the My Works - Interview page.

Winter Time... BLAH!

This is too funny. I thought I posted this a week or two ago but apparently not…

We are now fully into winter here in the Midwest. It’s cold as all get out, there’s a foot of snow on the ground, and even colder weather is coming, Needless to say, outdoor activities are quite limited short of hunting but even those are dwindling as certain seasons are closing.

I like to use the cold winter months a variety of ways.

The first thing I like to do is a deep-dive inventory analysis. What do I have, what did I move, what did I use, what items are running low, what items were not used at all. These are the questions and many like it, that I try and answer during an inventory analysis. Don’t get me wrong, I keep up to date all year long with items like consumables but sometimes that post-it note reminder goes through the wash before the data is inserted into the spreadsheet(s).

Another activity I usually pursue is indoor range time, sporting clays, and duck/goose/pheasant hunting. Unfortunately, with all of the mishegoss associated with the election, the availability of ammo is quite precarious so I’m loathe to expend ammo frivolously right now. I have had some good luck going to a couple gun shows in the region in terms of finding popular calibers at reasonable prices but the masses are starting to catch on. If you don’t get there when the doors open the first day you might find yourself holding a fist-full of cash instead of heavy-ass grocery bag laden with ammo!

Truth be told, I started buying all of my ammo at gun shows long before the 2020 election cycle. The reason for this is simple. Brick and mortar stores started swiping/scanning my ID for every ammo purchase. It used to be that they just visually verified your age. Not any more. The first time a cashier asked for my ID and started to swipe it through their card reader I stopped them, questioned what they were doing, took my ID back, left all of the ammo on the counter, and walked out. It is none of the government’s business how much ammo I bought and of what caliber. Ever.

ANOTHER Book Released!!!

Well folks, I did it! My second non-fiction book in as many months is finally out the door! Preparing to Prepare: A General Guide to Self-Sufficiency and Preparedness is now available on Amazon!

Preparing to Prepare-e-EB-small.jpg

The Preparing to Prepare non-fiction work began taking shape in written form around the same time as the non-fiction Home Remedies piece. The information contained within this work, though, has been rumbling around in my head for ages. What makes this work unique, I think, is that it allows readers to determine just what they want to prepare for (from weather to societal collapse) and estimate how long that disruption to their lives might last (< 1 week, > 1 week but < 1 month, or > 1 month). It is not an anthology for all things preparedness related. It is, however, a good read and a good place to start for anyone looking to outlast a disruption to their normal daily lives.

I think now I might take a little break and do some projects I’ve been wanting to try and/or fix some things around the house.

Plus, it’s winter, so it’s time to do some reflection on what worked, what didn’t, how can some things be improved, planning the garden, pricing out project costs, and of course there’s inventory to perform! Sometimes winter can be busier than the good weather months, depending on how you approach it.

Here’s the back cover text for those that are interested:

When people hear the words ‘self-sufficiency’ and ‘preparedness’ together in the same sentence, they typically conjure up images of tinfoil hats and reclusive preppers. However, just about everyone is, in a general sense, preparing for something. The difference is that we don’t ascribe those terms to say:

  • Grandma Betsy who grew and canned produce from her Victory Garden.

  • Suzy Homemaker who purchased some extra cases of water for her family for the heat of summer.

  • Bob Bizowner who purchased plywood to board up his business to protect it from anarchists, rioters, and looters.

  • Neighbor Jenny who purchased two months’ worth of everything before state lockdowns were initiated.

When we see examples like these, we say they were smart to be prepared or had good timing, in a positive way, not derogatorily.

Preparing to Prepare: A General Guide to Self-Sufficiency & Preparedness takes a duration-based approach to the potential disruptions that might befall an individual, family, community, or region. These disruptions to daily life could be minor (week or less), moderate (week to a month), or major (more than a month) and originate from the weather, society, health problems, employment loss, or something else. Preparing to Prepare walks the reader through personal assessments by asking the reader to answer very specific, thought-provoking questions geared toward understanding their environment and the potential pitfalls that life may throw at them. With those answers in hand, only then can the reader truly begin preparing for their chosen duration.

Book RELEASED!!!

Well folks, I finally did it! My first non-fiction book since 2013 is finally out the door! Home Remedies, Poultices, Salves, & Tinctures is now available on Amazon!

Home Remedies, Poultices, Salves and Tictures-e-EB-small.jpg

I guess I’m on a roll because that’s seven books published in seven years. Hopefully I can publish #8 before the year is out! Wish me luck!

This is a very proud achievement for me as a lot of research, work, and effort went into the writing of this book. I want to say a special thank you to those that have helped me along the way. Some provided their own family recipes for inclusion, while others pointed me toward additional information, and a select few graciously offered their reviewing, editing, and medical knowledge and expertise. This book could not have been complete without all you. I have copies of the book being sent to me to say thanks. For the rest of you, I hope you’ll consider picking up a copy.

Here’s the back cover text for those that are interested:

Did you ever get the feeling that we've become the most drugged nation on the face of the planet? Newspapers, magazines, radio, television… seemingly everywhere you turn, they all contain advertising for the latest and greatest drug. It’s to the point now that patients are getting medical advice from Big Pharma ad-men and news-reel propaganda. This needs to change, but how?

The first thing you need to do is stop listening to all of that white noise and start listening to grandparents and great-grandparents. Then, after that, you should dive into Home Remedies, Poultices, Salves, & Tinctures and find definitions for ingredients that you can grow in something as simple as a window box. Use these ingredients to create recipes that address everything from arthritis, colicky babies, and migraines to depression, bone spurs, and acne. There is a world of medicine at your fingertips and it's right outside your door.

Knickerbocker Bean Soup

Now that the weather is turning, I thought I’d share a soup recipe (complete with pictures!) that I was given by my friend, and co-author, Scott Boles. He and I collaborated on the Just a Small Gathering cooking and entertainment book years ago .Technically, it’s two recipes that make the Knickerbocker Bean Soup, but for ease of use, I’m going to give you both at the same time.

Here goes…

Ingredients:

  • 1 pkg Bacon, diced

  • 1 C Onion, diced

  • 1/2 C Flour

  • 1-28 oz. can of Navy Beans

  • 1-28 oz. can of Diced Tomatoes

  • 2 C Potatoes, diced

  • 3 Carrots, diced

  • 5 C Chicken Stock

  • 1 Ham Hock (optional)

Directions:

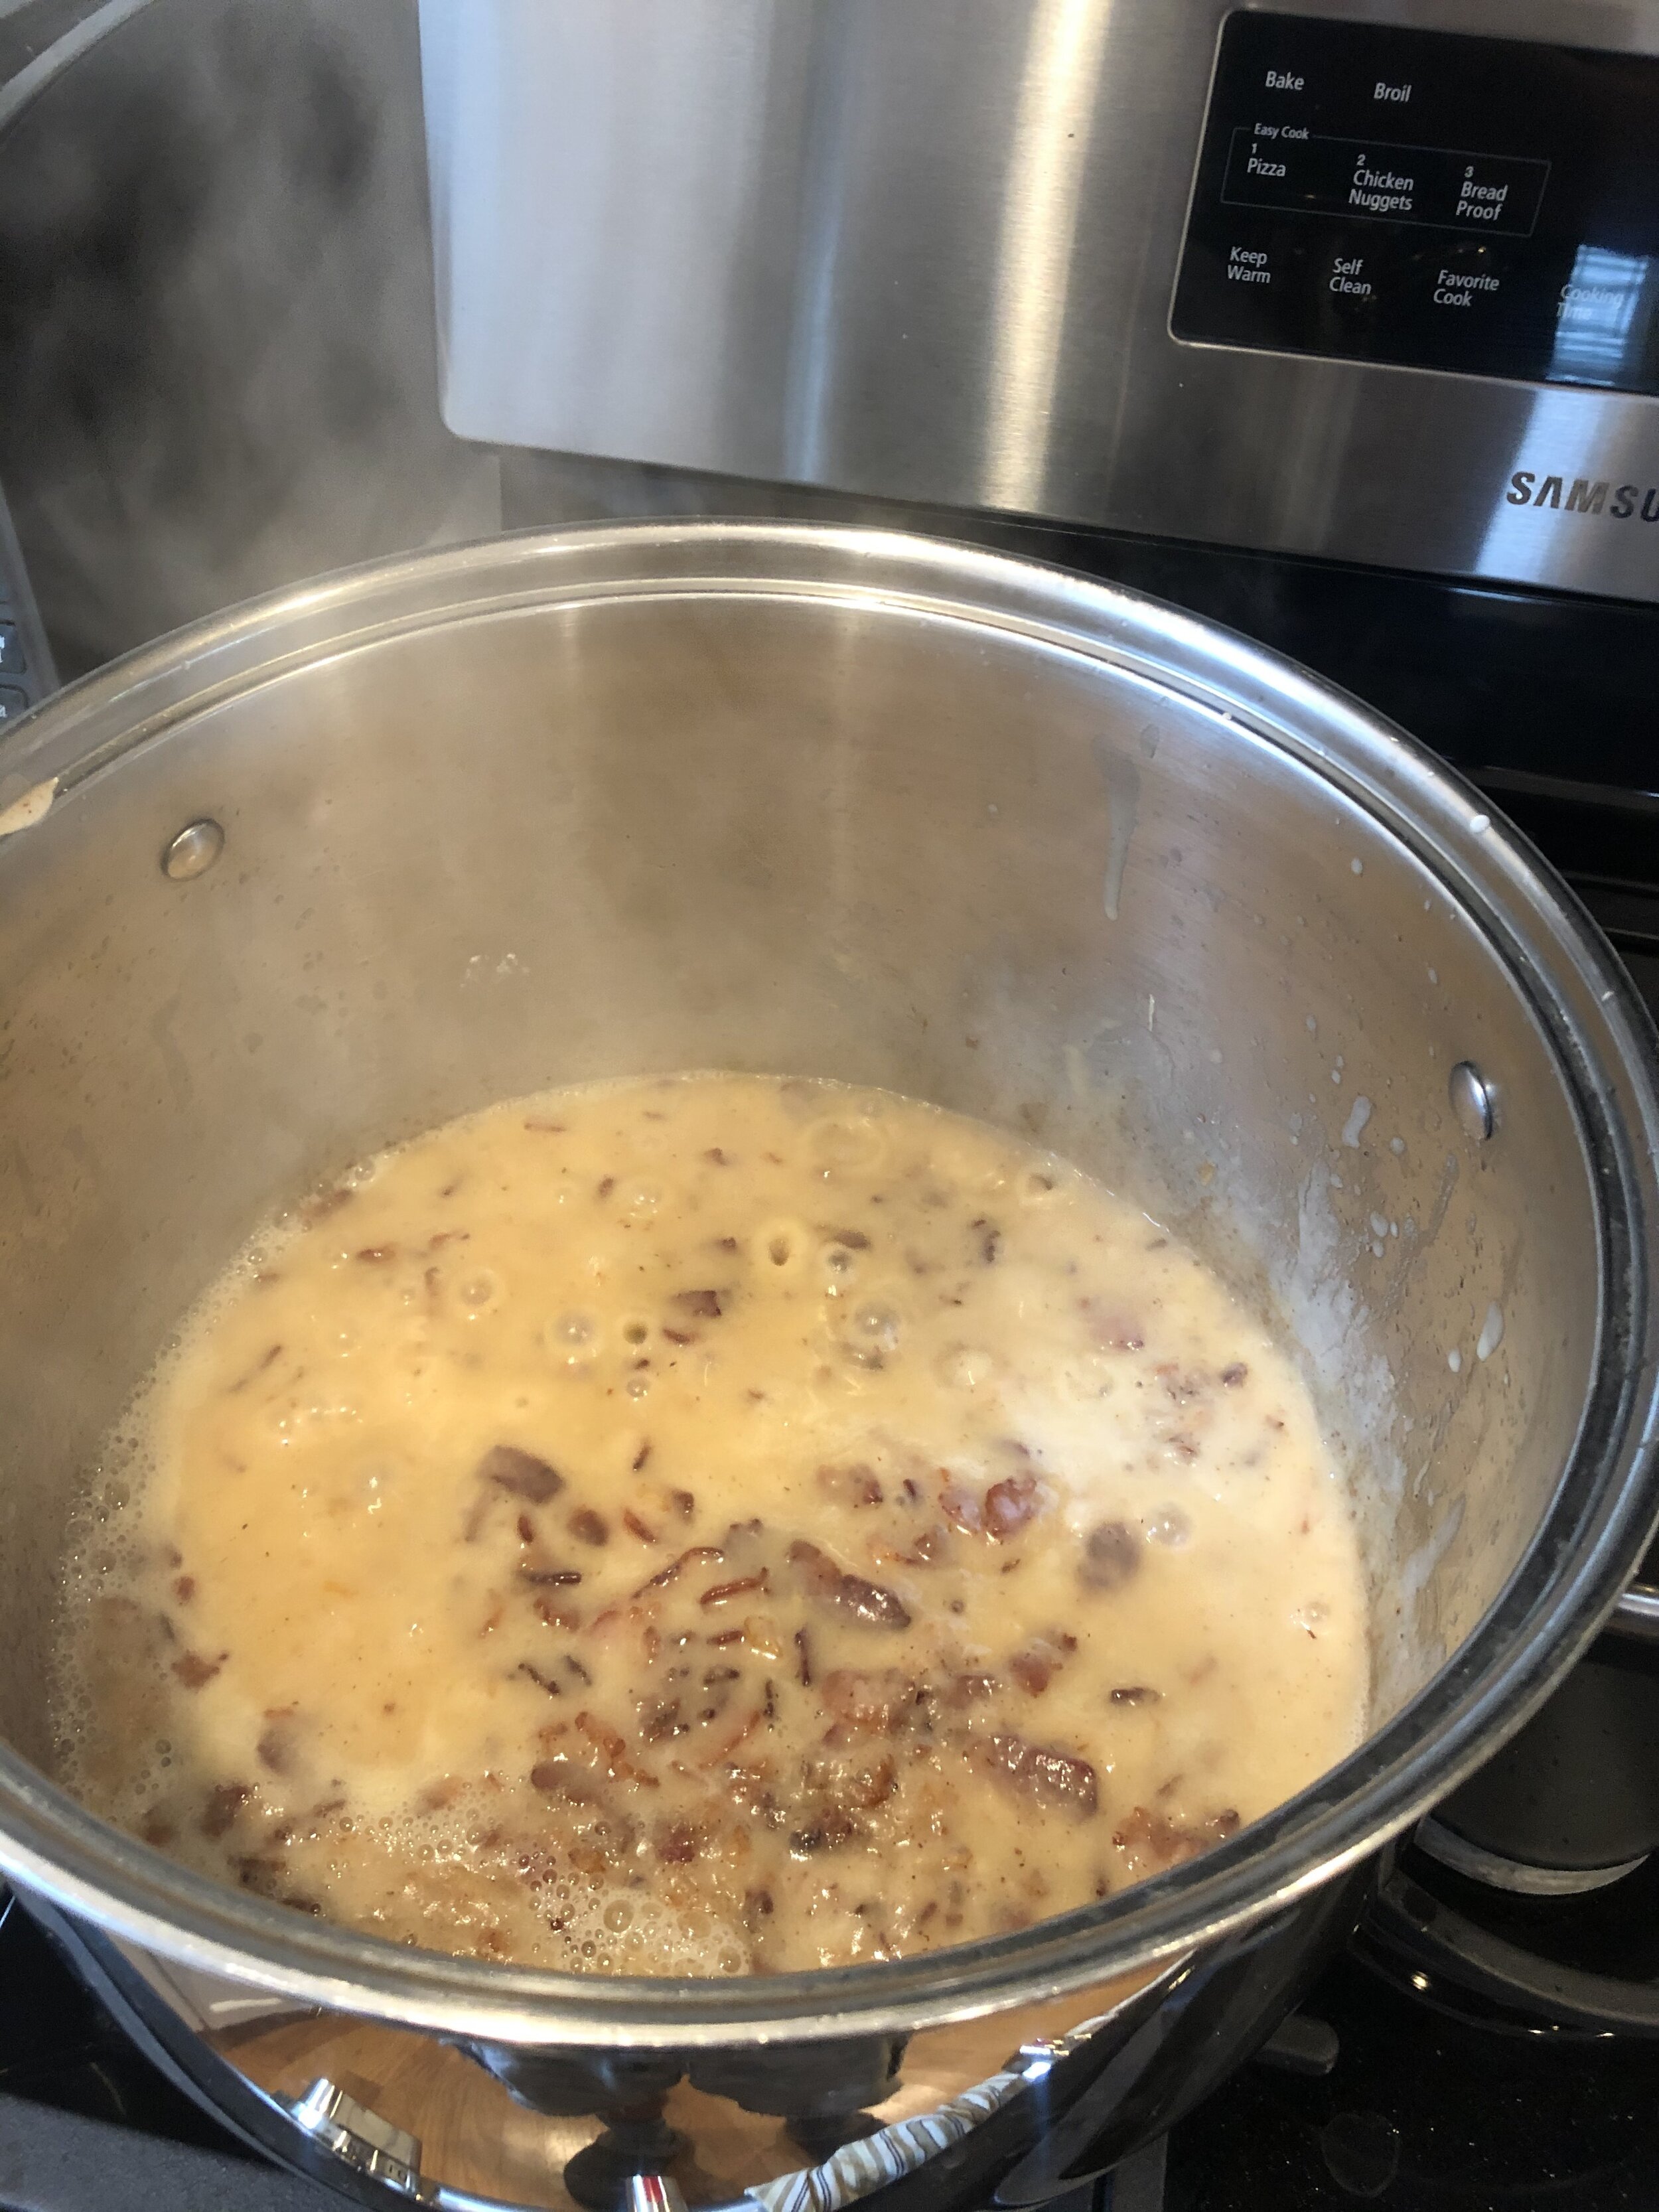
  1. In a large stock pot, brown the bacon until it is evenly cooked and crispy.

Here’s a tip: put the bacon in the freezer for 20-30 min so it can stiffen up. It’ll make it easier to cut.

Bacon1.JPG
Bacon2.JPG

2. Add the onions and cook until translucent.

Bacon2wOnion.JPG

3. Add flour and create a roux. Cook for 2 or 3 minutes.

Roux3.JPG

4. Add the remaining ingredients (stock, tomatoes, beans, carrots, and potatoes).

* If you’re use the optional ham hock ingredient, add it now as well.

AddTomato.JPG
AddBeans.JPG
AddCarrots.JPG
AddPotato.JPG

5. Allow the soup to simmer for two hours or until the potatoes and carrots are tender.

Simmerfor2hrs.JPG

I like to serve this with corn bread but any bread suited for a soup will do.

Leftovers can be ladled into Ziploc freezer bags (~4 healthy ladles feeds a family a four). Lay the bags flat once the soup is added, then express all of the air and then place on a rimmed baking sheet. Place the baking sheet in the freezer. Once frozen, remove the baking sheet and stack/align the bags like books on a shelf to save space.

To reheat, allow the frozen bag to thaw or place under running water in a large glass Pyrex dish until full. When reheating, note that the ingredients have absorbed the chicken stock so prepare an extra 2 C of chicken stock and add this to the pot while reheating.

Just a Small Gathering (Kindle) Just a Small Gathering (Paperback)

Water Disinfection

One of the doctors on a forum I am a member of posted a link to the Wilderness & Environmental Medicine website. His link pointed to an article discussing water disinfection. The article piqued my interest due to the title and because I know that water is key to handling any disruption length. After downloading and reading their research, I felt it would be helpful to post the file up on my Research Downloads page (scroll to the bottom) so you can have the information as well.

Updates and Recipes Abound

Lots of stuff to post about recently. Here goes…

Home Remedies, Poultices, Salves, and Tinctures

Phew! I am finished writing the non-fiction book Home Remedies, Poultices, Salves, and Tinctures book! I need to do a quick read through for consistency before I turn it over to a doctor friend (yes, he’s an actual M.D.!) to review and write a foreword.

Now it’s off to my other non-fiction piece titled Preparing to Prepare. Given the current state of things nationally and globally, the timing for each of these releases is pretty good I think.

Recipes

Been cooking a lot since this COViD-19 BS took over the country… so has everyone else. Most recently, I whipped up some baby back ribs, pork kabobs, and shrimp burgers! Oh my! Here are some pics and recipes.

Baby Back Ribs

My wife and daughter LOVE ribs and they always ask my wife’s father when he’s making ribs again. We got their recipe and decided to whip up a batch.

IMG_8403.JPG

The meat at Aldi is pretty good. We picked up this package for less than $8.00!

Here’s the recipe.

Ingredients:

  • 1 Rack of baby Back Ribs

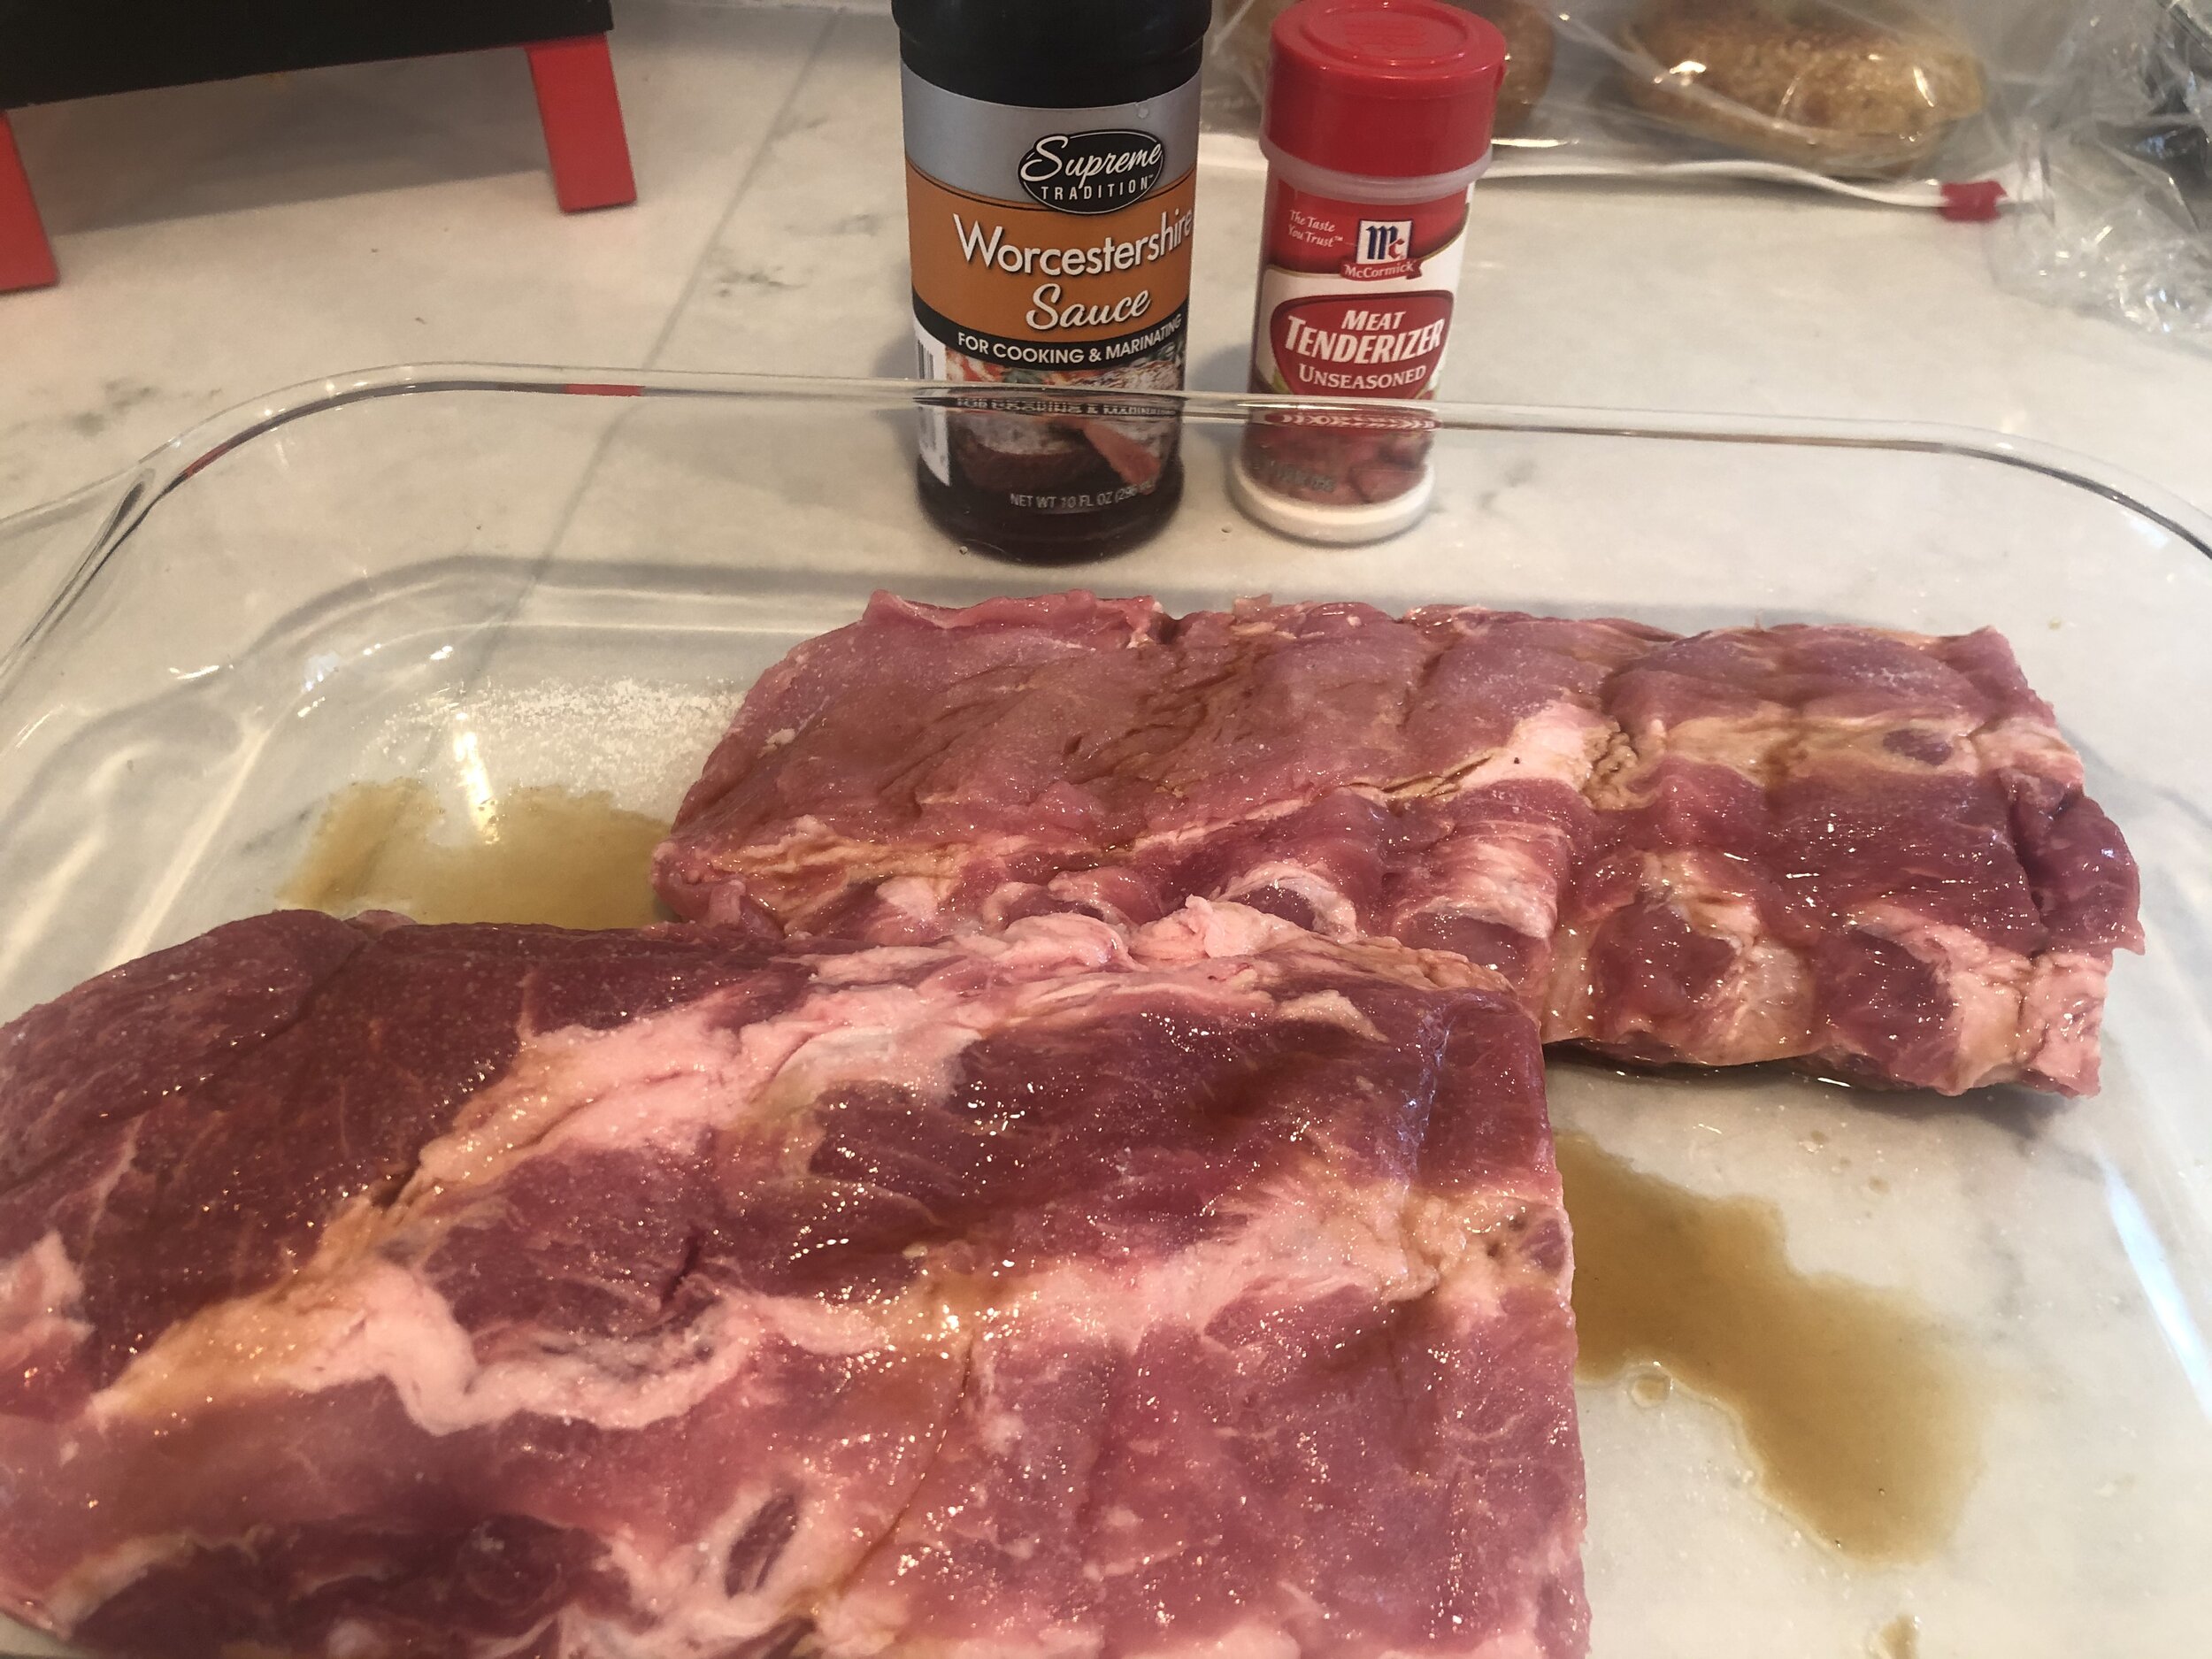
  • Worcestershire Sauce

  • Meat Tenderizer

  • Water

Directions:

  1. Preheat the oven to 325-degrees.

  2. Cut a rack of ribs in half and place both halves in an 9x13 glass Pyrex dish.

  3. Sprinkle Worcestershire sauce on top of each rack and a little in the glass.

  4. Sprinkle the ribs with meat tenderizer.

  5. Fill the glass dish 1/2 full with water.

  6. Cook for 2 1/2 hours at 325-degrees.

  7. 15-20 minutes before finishing in the oven, make a small amount of coals on the grill and light.

  8. When finished in the oven, transfer ribs to a platter and coat with bbq sauce then place on the grill.

  9. Heat on the grill for about 5 minutes per side.

  10. Serve hot.

1 rack of ribs feeds approximately 3 people if there are enough sides to supplement the ribs.

IMG_8405.JPG
IMG_8411.JPG

Pork Kabobs

Next up was the pork kabobs. For this we bought a 4-pack at Sam’s Club for $10.00. I cooked two for this recipe and threw the other two in the chest freezer for later. This recipe is pretty simple as well.

Ingredients:

  • 2 Pork Tenderloin (silver skin removed)

  • 4 T Olive Oil

  • 4 T Soy Sauce

  • 2 T Honey

  • 2 T Cilantro Lime Seasoning

Directions:

  1. Wash off and pat dry the pork tenderloin.

  2. Remove and fat and silver skin from the meat.

  3. Cut the pork into 3/4” thick medallions and then cut the medallion in half

  4. Warm the homey in the microwave for 20-30 seconds.

  5. Combine the olive oil, soy sauce, honey, and seasoning in a bowl and mix.

  6. Pour the marinade into the 9x13 glass Pyrex dish.

  7. Add the pork tenderloin and toss with you hands or a spatula to coat.

  8. Cover with plastic wrap and put it in the fridge for an hour.

  9. After an hour, uncover and stir then leave covered on the counter for 30 minutes to return to room temperature.

  10. Skewer the meat (preferably on metal skewers) and any vegetables you want to grill as well (separate skewers for the meat and veggies).

  11. Preheat the grill on high for 5-minutes then turn off the two outside burners (3-burner gas grill) and reduce the heat on the center burner to medium low.

  12. Place the meat skewers on the outside of the grill (not directly above the lit center burner)

  13. Grill for 4-minutes per side (there are four sides) but be careful not to let them burn. If burning occurs rather quickly then reduce the heat a little bit.

  14. Add the veggie skewers when you turn the meat for the first time.

  15. Using a meat thermometer, check the temperature. When you hit 145-degrees they are done. Remove all skewers from the grill

  16. All meat skewers to rest for a few minutes.

IMG_8508.JPG
EDJK4581.JPG

Shrimp Burgers

The last, most recent recipe I unleashed was my shrimp burgers. Typically I only cook these when we are on a beach vacation but since COViD happened, we didn’t get to the beach this year.

Ingredients:

  • 2 slices Wheat Bread (or 2/3 C breadcrumbs, 1/3 C per slice)

  • 2 lbs. Shrimp (raw, peeled, deveined)

  • 1 Egg

  • 1 T Onion (grated)

  • 3/4 T Old Bay Seasoning

  • 1/4 t Black Pepper

  • 1/4 C Cilantro

Directions:

  1. Chop 1/2 lb. of the shrimp into 1/2 inch pieces. Transfer to a bowl.

  2. Pulse the two slices of wheat bread in a blender to make coarse crumbs (3-4 pulses). Transfer to the bowl with the shrimp (or use prepared breadcrumbs, not the Italian seasoned variety - you want plain).

  3. In the empty blender, add 1/2 lb. shrimp, egg, onion, Old Bay, and pepper. Pulse until there is a mix of fine mince and coarse chopped piece (6-7 pulses). Transfer to the bowl. This will be sticky so use a spatula to assist you in removing.

  4. Add another 1/2 lb of the shrimp to the empty blender and pulse (6-7 pulses). Transfer to the bowl. Repeat with the remaining 1/2 lb. of shrimp.

  5. Add the cilantro to the bowl and mix to thoroughly combine.

  6. Shape the mixture into six individual 1/3 C balls. Flatten to 1/2 inch thick patties.

  7. In a large frying pan, heat 1 1/2 T of oil on medium-high until it shimmers (~ 1 minute).

  8. Reduce heat to medium and add the shrimp patties. Patties will stick no matter what so move them around the pan to prevent sticking.

  9. Cook until the edges are pink and the patty is golden (~ 3-4 minutes). Flip the patty and cook for an additional 3 minutes or until done.

  10. Serve plain with cocktail sauce or a sauce of your choosing with or without a bun. Feel free to add lettuce, tomato, and sauce to the bun if you like.

IMG_8506.JPG
IMG_8507.JPG

Garden

And lastly we have the garden. By all accounts, it is doing better than in years past because when the in-laws were out of town last fall I did some unsanctioned tree trimming. Shhhh! I have been informed though that the crap tree that is my nemesis is coming down in October. Hooray! More sunlight for longer!

Given that new information, and coupled with the fact that some of the timbers are rotting, I will be reconfiguring the garden for better accessibility.

VSLZ1884.JPG
OSGE5955.JPG

Here’s how it’ll be set up for better, easier access for harvesting:

Garden 2021.png

As it stands right now, the beds are too deep to access all of the plants from inside the garden proper. To get to some of the plants I have to be outside the garden… and that’s just weird and highly inefficient for my brain to process..

Traditional Pine Pitch Patch

I was having some difficulty sleeping the other night and decided to try and work my way through some recorded shows on the DVR. One of the recordings was the Mountain Men series. In this particular episode, one of the guys (Tom Oar) is building a traditional dugout canoe for a museum and accidentally puts a hole in the boat.

What happened next fascinated me.

He and his brother proceeded to make a traditional product called a pine pitch patch. Tom even dictated the formula for the camera and viewers.

  • 65% Pine Pitch

  • 15% Dried Buffalo (Bison) Dung

  • 15% Cooked Egg Shells

  • 5% Beeswax

Let’s breakdown the ingredients in Tom’s recipe. All of the ingredients carry waterproofing qualities but two (pine pitch and beeswax) also work as the adhesive.

Pine Pitch

First things first… what is pine pitch?

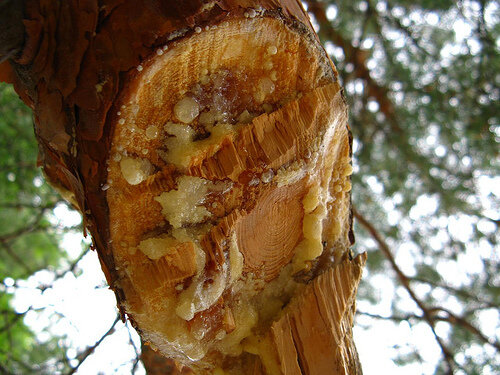
Well, anyone that grew up where I did (completely surrounded by pine trees) can tell you that pitch is basically the crystallized sap. It’s not in a honey-like liquid state and it hasn’t hardened into resin yet. It’s somewhere in-between. Pitch is still somewhat malleable and makes a great fire starter.

pine-pitch.jpg

Here’s an article that discuss the differences between sap, pitch, and resin. The above image is from that article.

Buffalo (Bison) Dung

Now, there aren’t any bison near me except in the zoo. I do happen to know someone that works there though so I imagine I could get my hands on some. In this scenario, I imagine dried cow or horse dung would work too. The purpose behind the dung is waterproofing. A mixture of mud and dung was traditionally used on the floors and walls of the first homes and is still used in places like India. Weird, but ok. Doesn’t seem very sanitary though. I think I’ll stick with Tyvek!

Here’s an article about the many uses of cow dung.

Egg Shells

The egg shells in Tom’s recipe refers to egg shell powder and not chunks of cooked shells. Basically, save the egg shells from scrambled eggs, hard boiled eggs, baking, or from any other purpose where eggs were used. Then:

  1. Wash the shells out under warm running water to remove any remaining egg parts and membrane.

  2. Boil the shells for two minutes.

  3. Place the boiled shells on a parchment paper covered cooking sheet and bake at 225-degrees for 45 minutes to remove all moisture.

  4. Place the cooked shells in a high-speed blender and grind them down into a fine powder.

The egg shells in Tom’s recipe is another ingredient used as waterproofing. It also helps the patch maintain some resiliency and durability as the canoe encounters rough shores and rocky river bottoms.

Beeswax

This ingredient is yet another waterproofing material but also, along with the pine pitch, helps as an adhesive. There are thousands of uses for beeswax. Far too many to mention here.

Now, from there, Tom and his brother combined the ingredients, heated them into a liquid like paste, then spread the pine pitch over the hole, inside and out. Once there was a layer of the pine pitch goop around the hole on the outside of the canoe, they then applied a piece of antelope rawhide and covered that with the remaining pine pitch patch material.

Now you know how to repair your traditional dugout canoe with traditional materials.

Fascinating.